Inspiration and Research
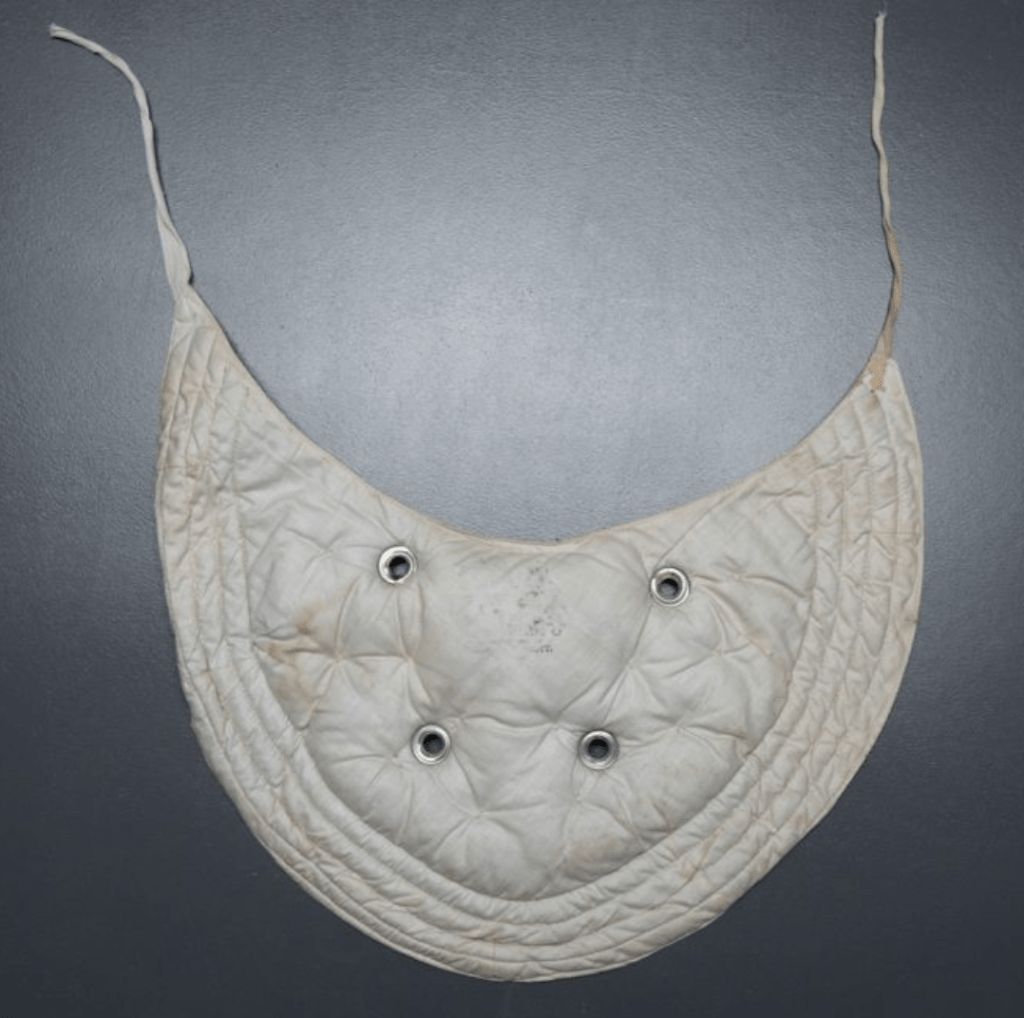
To create the fashionable skirt shape for 1890s, I took inspiration from this example of ‘The Scott’ Ventilated Hip Pad & Bustle by Charles H. Scott, c. 1905 at The Underpinnings Museum. It is very similar to a design for a ventilated bustle and hip-form by Charles H. Scott patented in 1903. The example at the Underpinnings Museum is made from cotton fabric, filled with horsehair and uses metal eyelets. It is designed to be worn under the corset, as shown by the the illustrations to the patent and the label to another version of ‘The Scott’ at FIDM museum (see photo further down).
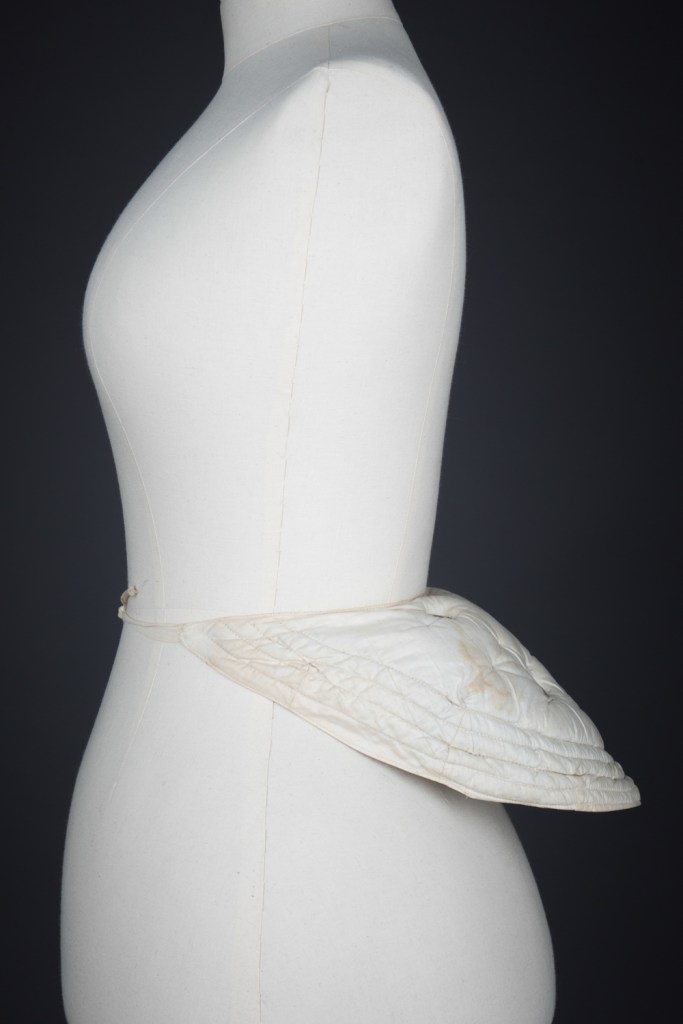
‘The Scott’ Ventilated Hip Pad & Bustle by Charles H. Scott, c. 1905. KL-2017-087. Underpinnings Museum.
Photographed by Tigz Rice, 2017.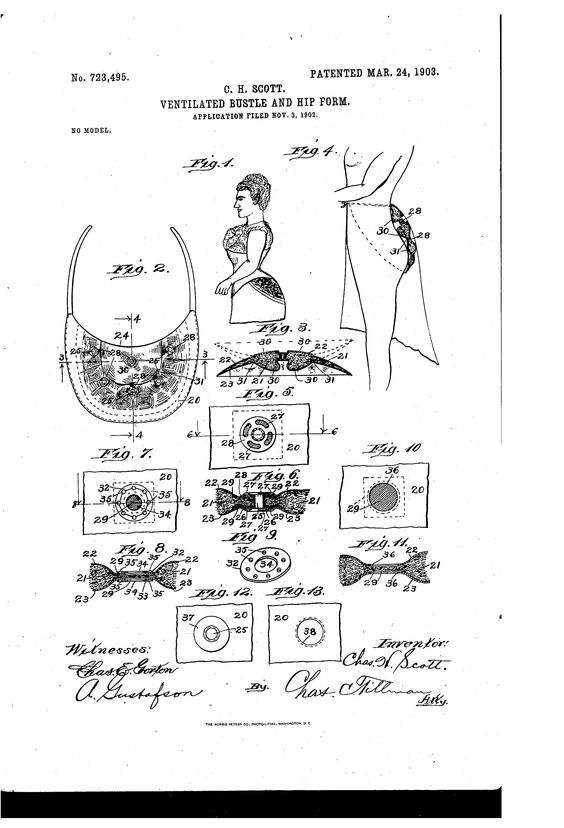
Ventilated bustle and hip-form US723495A by Charles H Scott (1903).
The patent was very valuable to read about the construction and materials used. It states that the bustle pad should be made from “any suitable material, but preferably of cloth which is substantially non-porous and very closely woven to prevent the curled hair of the padding piercing or passing through”. The “curled hair” is most likely horsehair. I substituted recycled wool stuffing because it’s a natural fibre I had readily available and is also an animal hair; albeit from a sheep, not a horse. I have seen other examples of the bum and hip pads that used a glazed cotton fabric; which was commonly used for linings in the nineteenth century. Luckily, I had some glazed cotton chintz I had got for free from a donation bag — perfect for a bum pad, I thought!
The outside of the pad is quilted with several channels. The patent states that the bustle is “sewed together at the edges and are so padded that they will present tapered or feathered edges all around the device” so the line of the pad will not be “discernable” under the skirts but blend smoothly.
The innovation of ‘The Scott’ is the metal eyelets; it is “perforated so that the heat of the body and air may pass through” and “shall not be uncomfortably warm for the wearer”. However, if one does not have metal eyelets, the patent also states that the openings “may be worked around their edges like buttonholes” with “two pieces of gauze or reticulated material” between the two coverings for ventilation. In addition, it states that “the bustle and hip-form is tufted as usual”. Tufting prevents the stuffing from shifting and creates the dips in the pad that allow air to move away from the body.
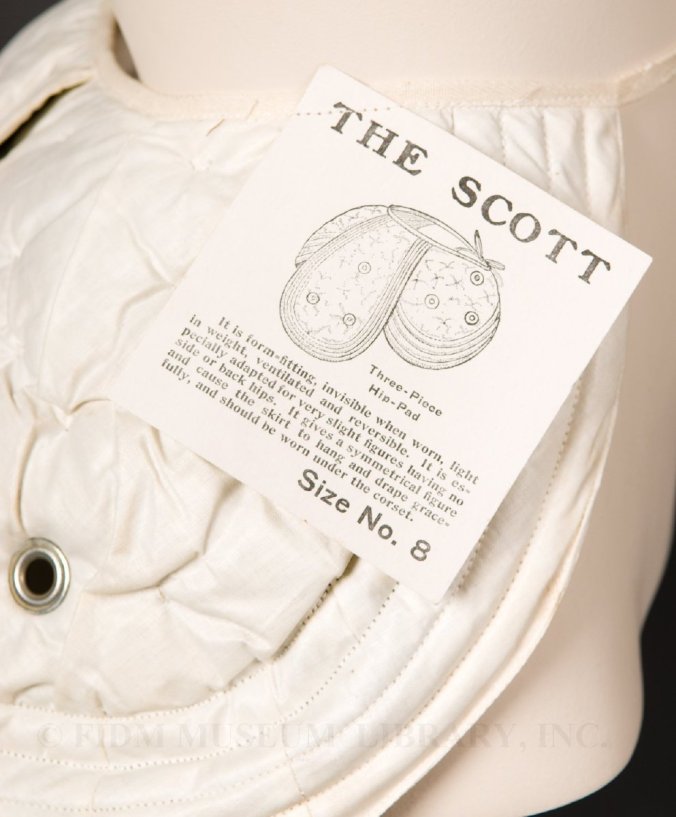
Original label noting “should be worn under the corset”. FIDM Museum, c. 1895–1905.. 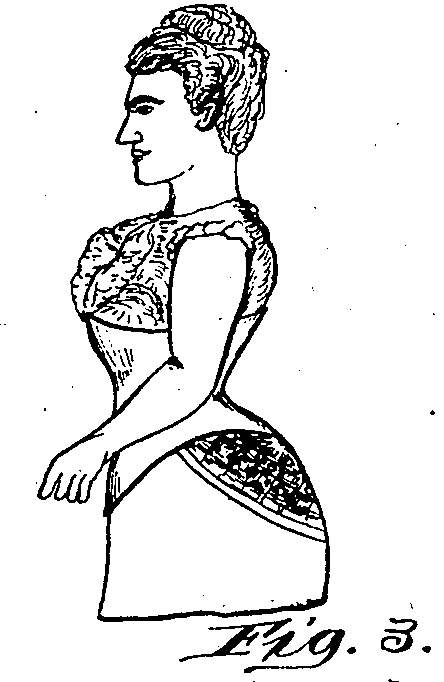
Illustration in the Scott patent, showing the bustle pad worn under the corset.
Pattern
I drafted my own pattern based on the examples and adapting an existing pattern I made to my waist measurements for an eighteenth-century bum pad. It should work for several sizes. It is designed to come around your waist to add a little to the hips as well, like in the illustration to the patent.
How to adjust to your size: The pattern is for a 28″ waist but, as it is not highly fitted, it can suit other sizes. To adjust the pattern for your size, add or take away width at the fold line for your size. To reduce: for 26″ waist take away 3/8″; for 25″ waist take 6/8″; for 24″ take 1″; for 23″ take 1 1/4″. To increase: for 30″ waist add 1/4″ on the fold; for 32″ waist add 1/2″; and in 1/4″ increments and so on.
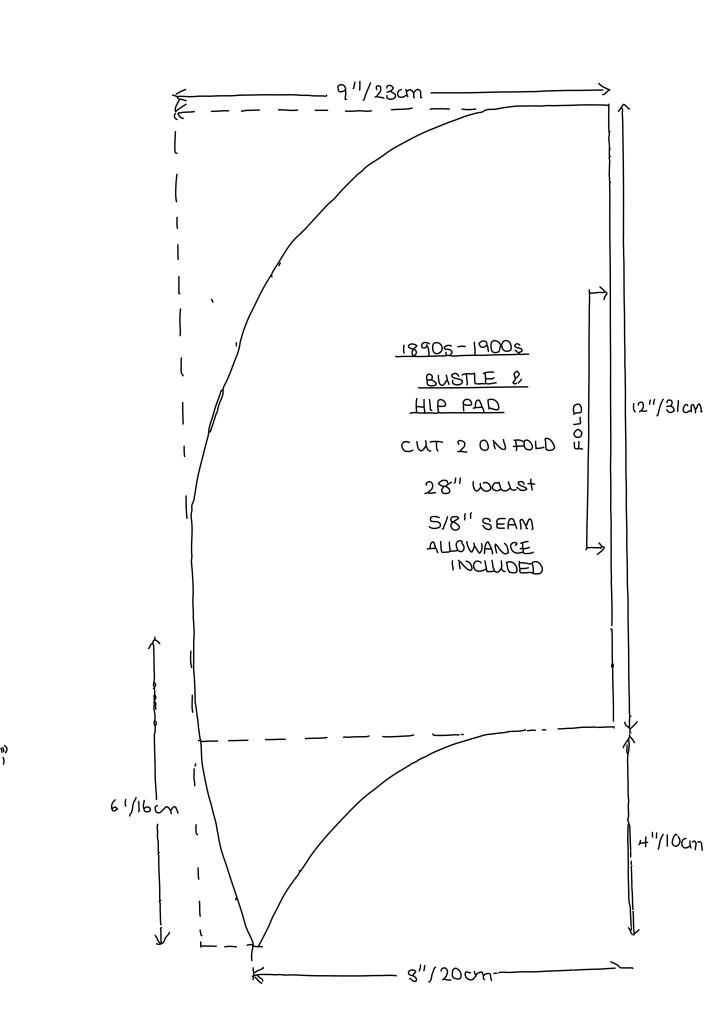
How to print to scale: Download the pdf version of the pattern below. Choose scale 100% and choose to print ‘Poster’. The pattern should print on 4 sheets of paper.
Found this pattern helpful? Show your appreciation by buying me a coffee on Ko-Fi.

Fabric and Materials
Outer: 0.5m white glazed cotton chintz or any close-woven cotton fabric.
Interlining (optional): 0.5m polyester or cotton batting.
Stuffing: recycled pure wool stuffing, horsehair or any other stuffing.
Grommets: Four or five 14mm Prymm silver eyelets (plus fixing tool).
Binding: 3/4″ (20mm)-wide to 1″ (25mm)-wide white cotton bias tape or cotton tape.
Waist ties: two 1/2″ (12mm)-wide 0.5m-long lengths of white cotton twill tape.
Other tools and notions: thick white thread for tufting, fabric marker, quilters clips, button-hole punch or sharp embroidery scissors, crafters mallet.
Construction
Step One: Cutting. After drafting the pattern, cut two pieces on the fold. I used some white glazed cotton chintz that I had in my stash. Then cut the same shape from the batting.
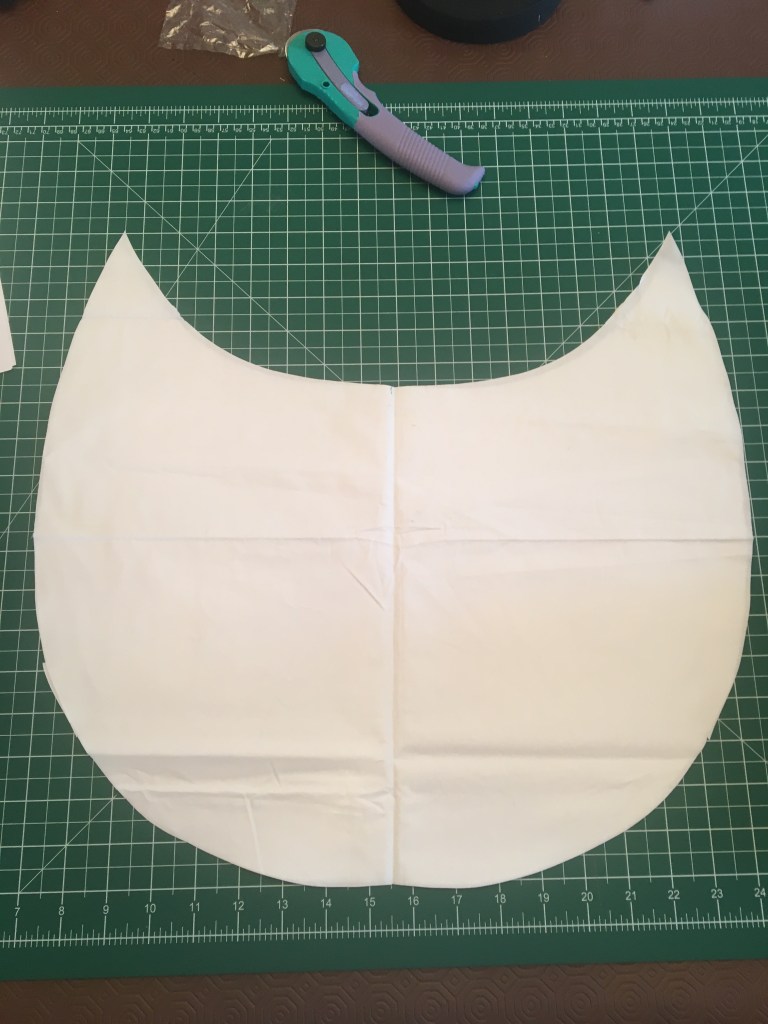
Pattern pieces cut from outer fabric 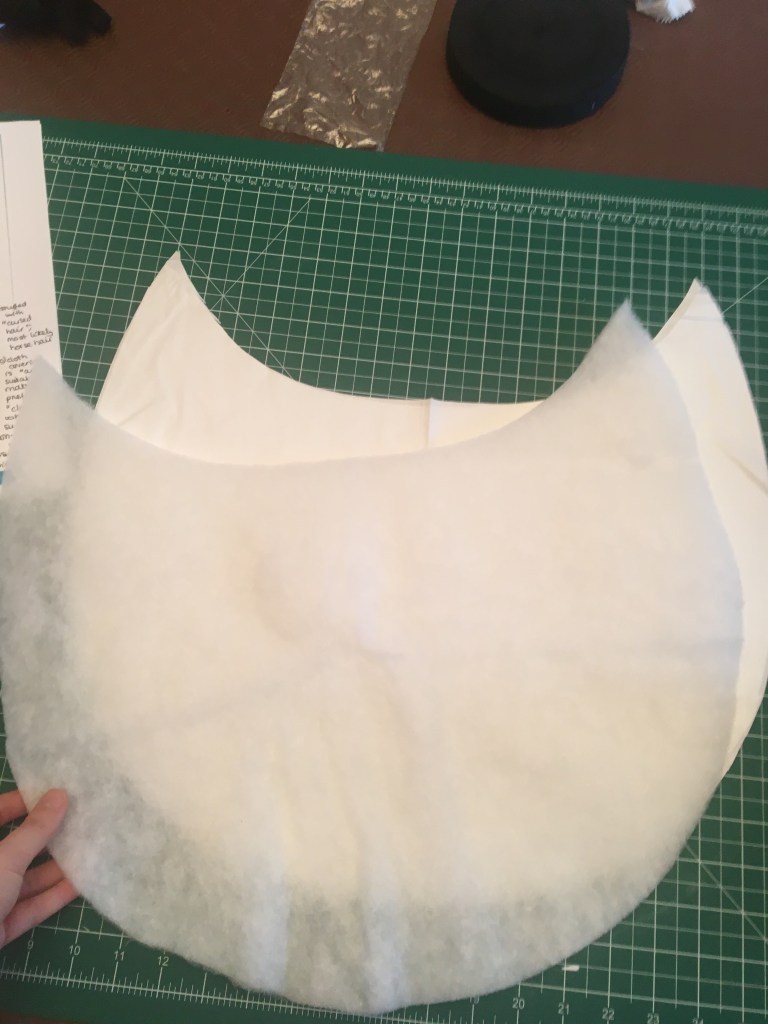
Batting interlining placed on top
Step Two: Assembling. Place the outer fabric pieces right-side together and then place the batting piece on top. Pin together and then sew around the outer edge, leaving the top open. Clip the curves, turn right-side out and press. Note: When stuffing the bustle, put the stuffing on top of the batting to create a domed shape. The flat side will go against the body and the stuffing will be towards the outside to create the desired shape. The original did not do this as far as I know, but it makes the quilting easier.
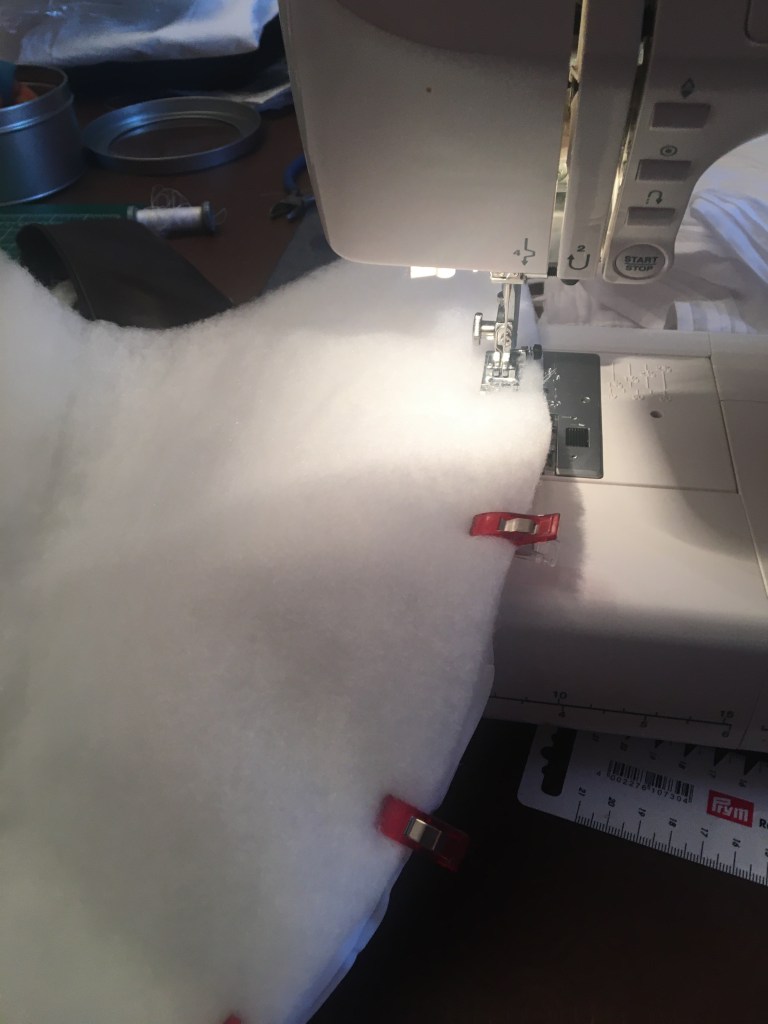
Sewing along the outer edge. The batting on top. 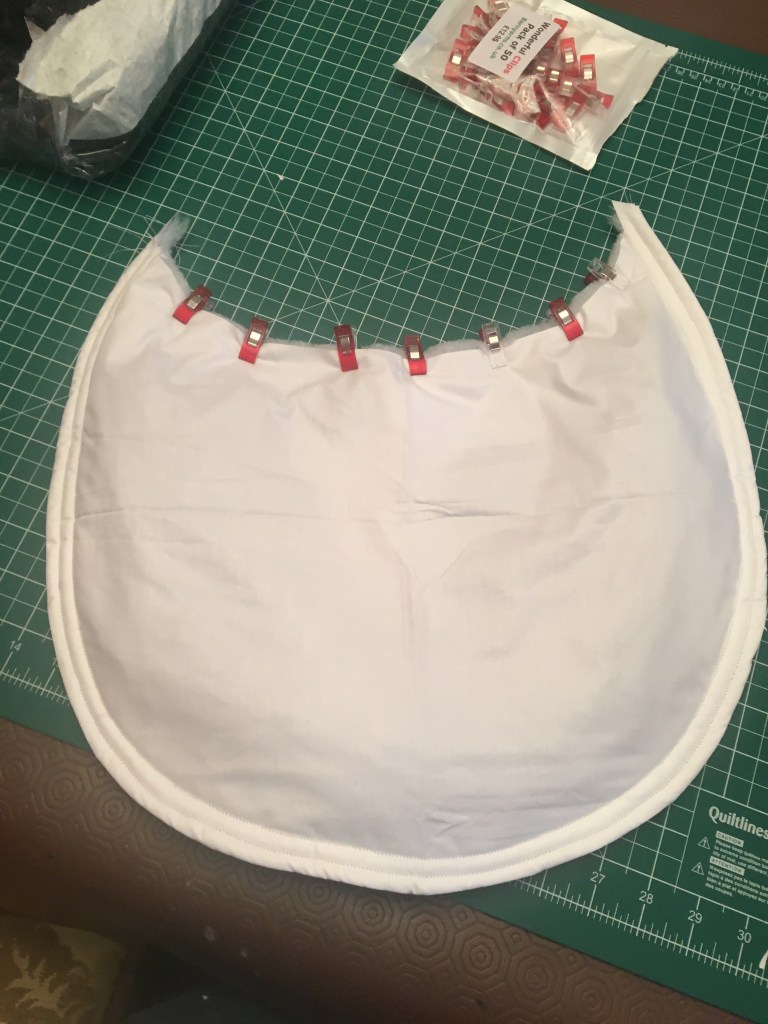
Sewing the quilting channels 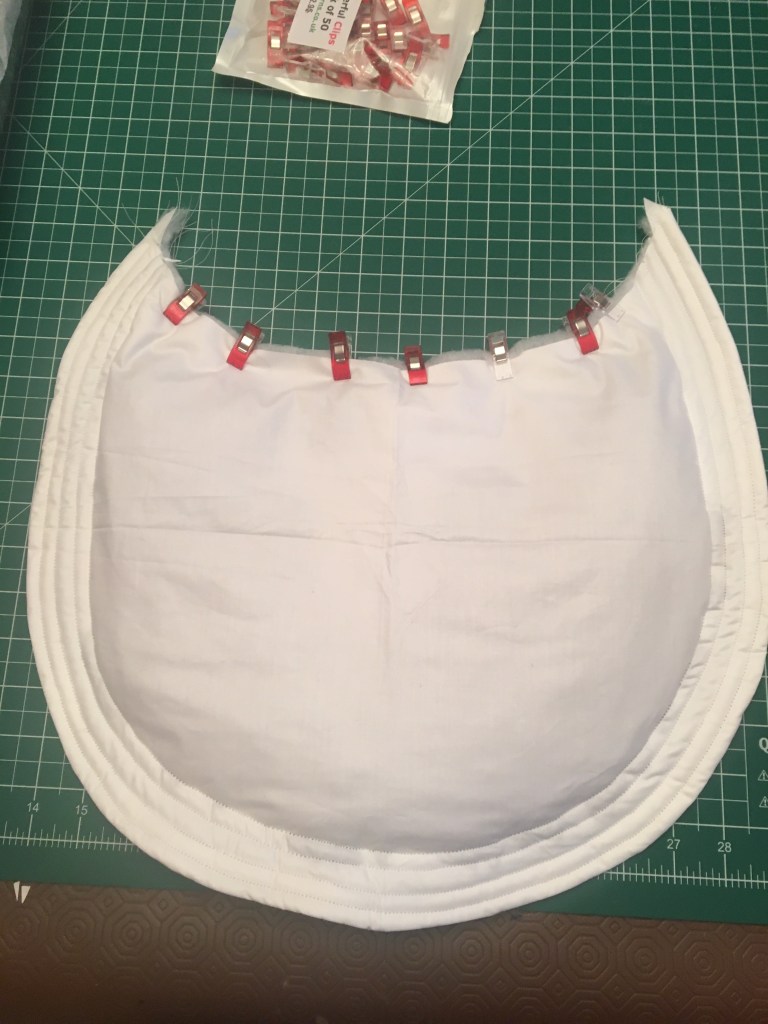
Four channels finished and some of the stuffing added.
Step Three: Quilting. To create the ‘feathered edge’, sew 3/8″ (I used the edge of the presser foot) from the edge and then another 3/8″ from that one to create the first two channels. Next, increase the thickness of the quilting by adding some stuffing along the sewing line and sew two more quilting channels, this time 1/2″ wide. For the final channel, add more stuffing and increase the width to 3/4″. I used quilters clips along the top to hold the stuffing in whilst putting the bustle under the machine. You should have five quilting channels.
Step Four: Setting the eyelets. Using a fabric marker, mark where you want to place the grommets. Examples seem to have three to five eyelets spaced equally in a crescent shape in the centre of the bustle. Using a button hole punch or a sharp pair of embroidery scissors, make slits through all the layers. Be careful not to make the slits too big, you can always make them bigger but can’t make them smaller! Set the eyelets using the fixing tool included in the pack.
‘The Scott’ Ventilated Hip Pad & Bustle © Underpinnings Museum 
Eyelet placement on bustle pad on eBay
Step Five: Stuffing and closing the top. Finish stuffing your bustle to desired fullness using your batting offcuts and the rest of your stuffing. Put more stuffing in the middle of the pad to create a centre “enlargement”, as stated in the patent. Pin or use clips to close the opening and sew along the opening 3/8″ from the edge. Bind the top with bias tape or twill tape.
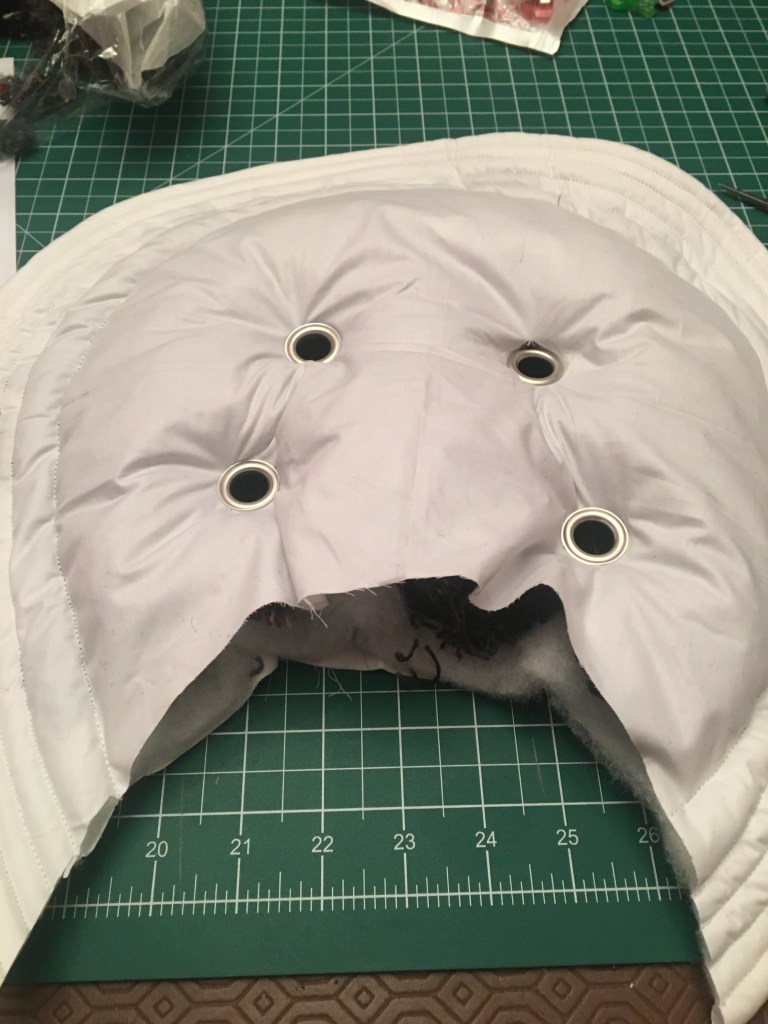
Adding the stuffing to the bustle after the eyelets have been set in
Step Six: Tufting. Using a strong thread doubled add tufting to hold the stuffing in place. Tufting is simply backstitching in the same place. I put eight tufts in a crescent around the outside and another three around the enlarged centre — one between each eyelet.
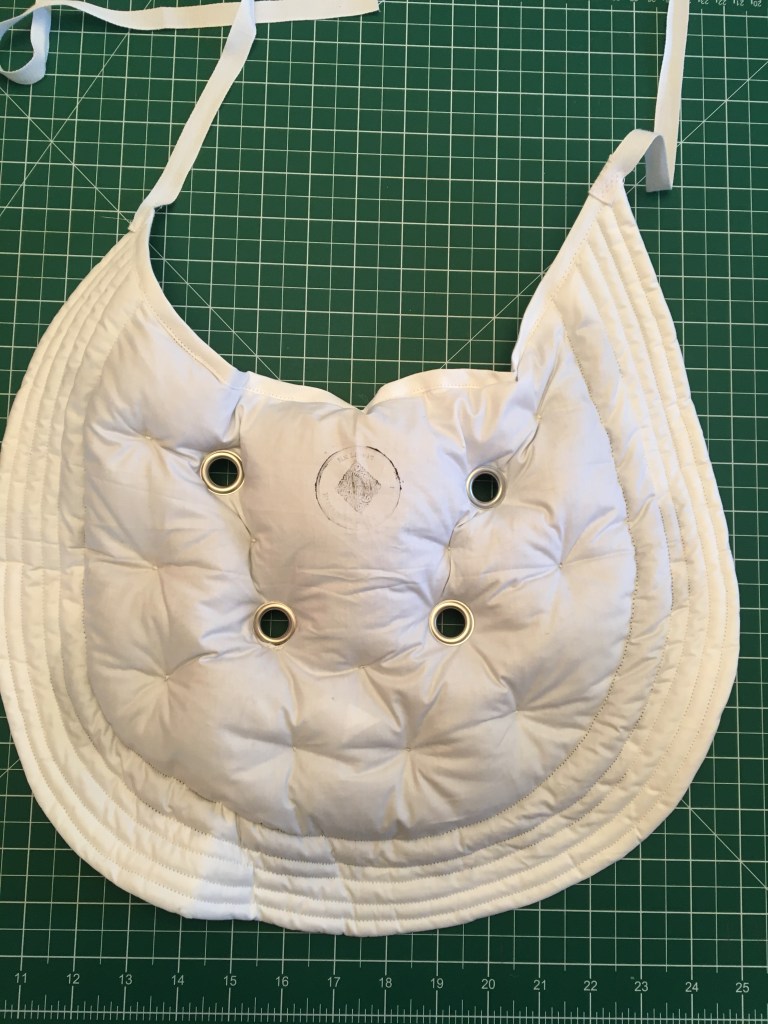
Top of bustle pad. I added my own stamp to echo ‘The Scott’ makers stamp on the original. 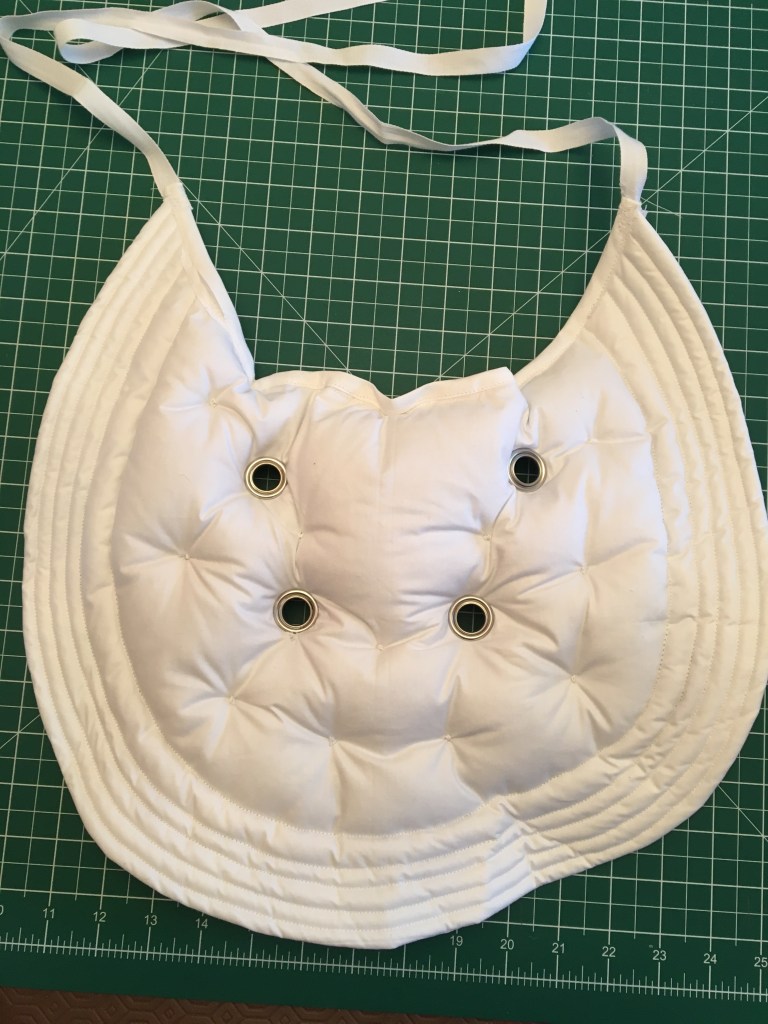
The bottom of the bustle pad showing the tufting.
Step Seven: Adding the ties. Sew the two lengths of cotton tape to each end of the pad to create the ties. You have now finished the bustle pad!
Finished! 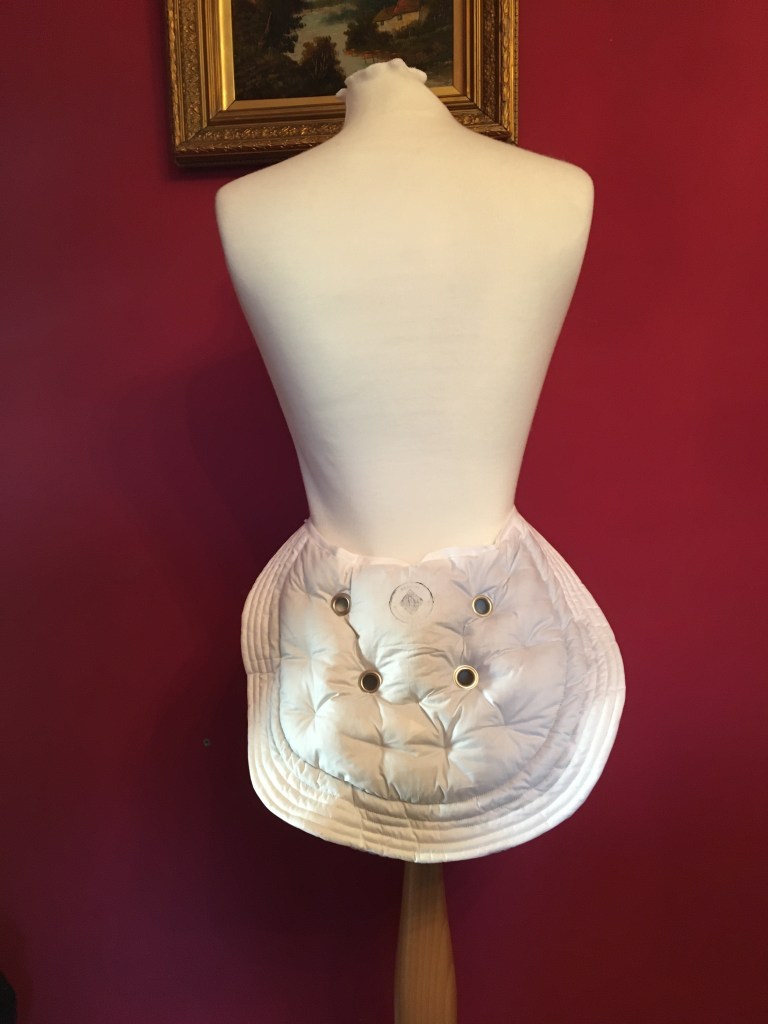
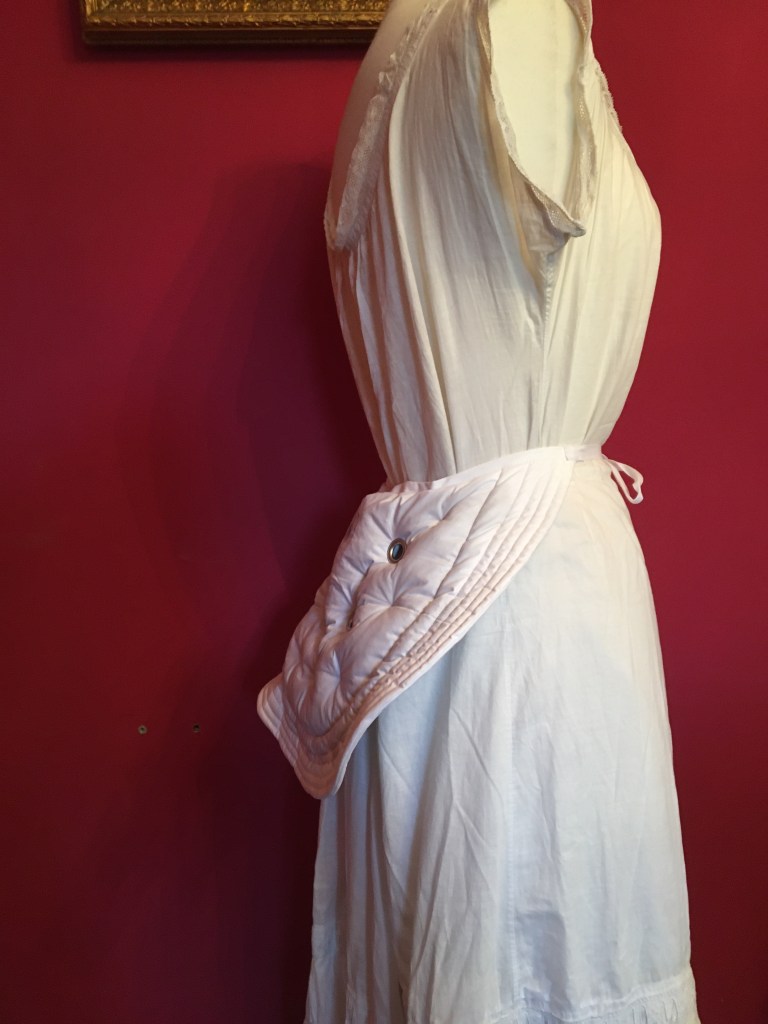
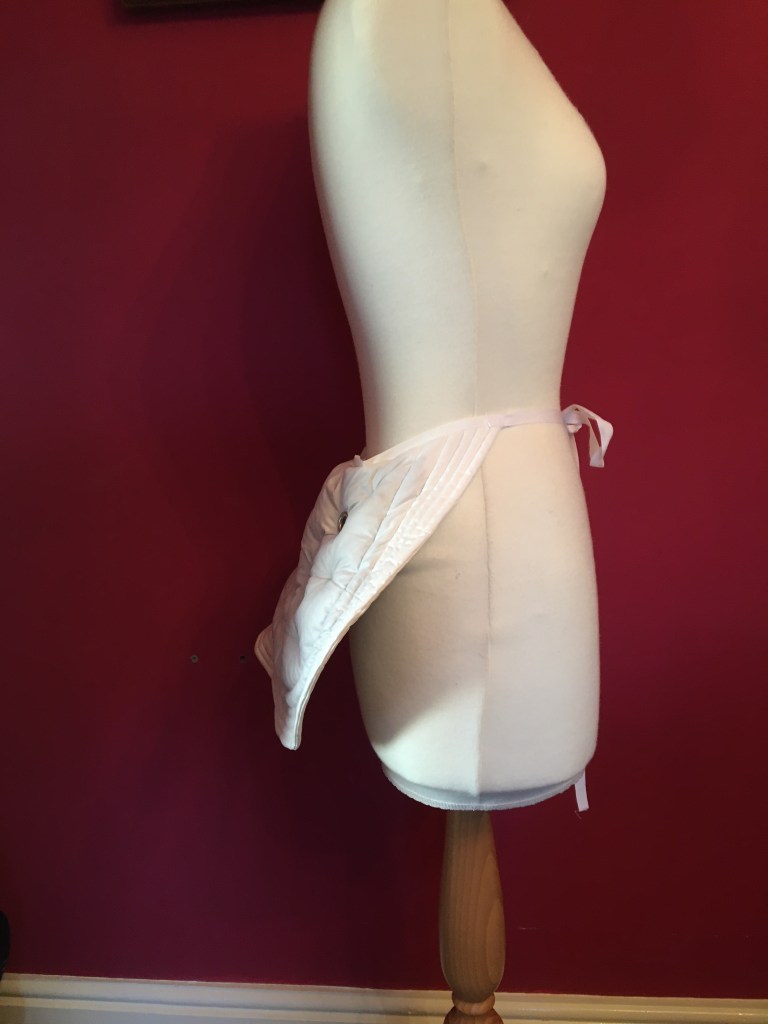
The finished pad over original c.1890s-1900s undergarments. 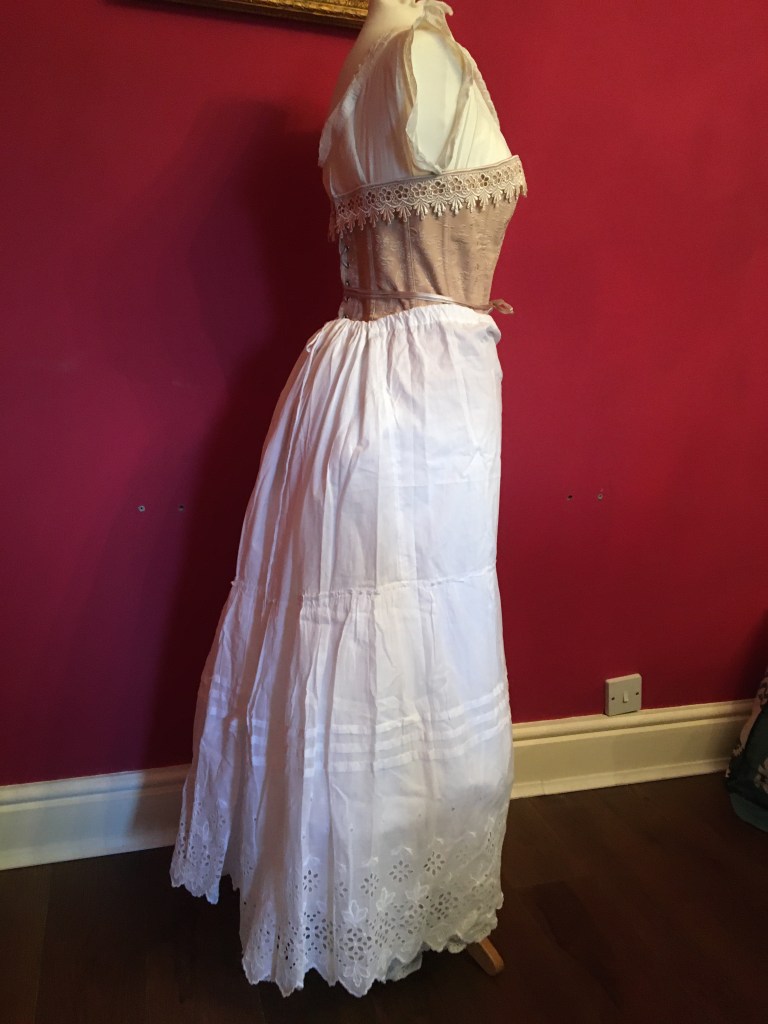
The finished bustle pad displayed under corset and original c.1900s petticoat. 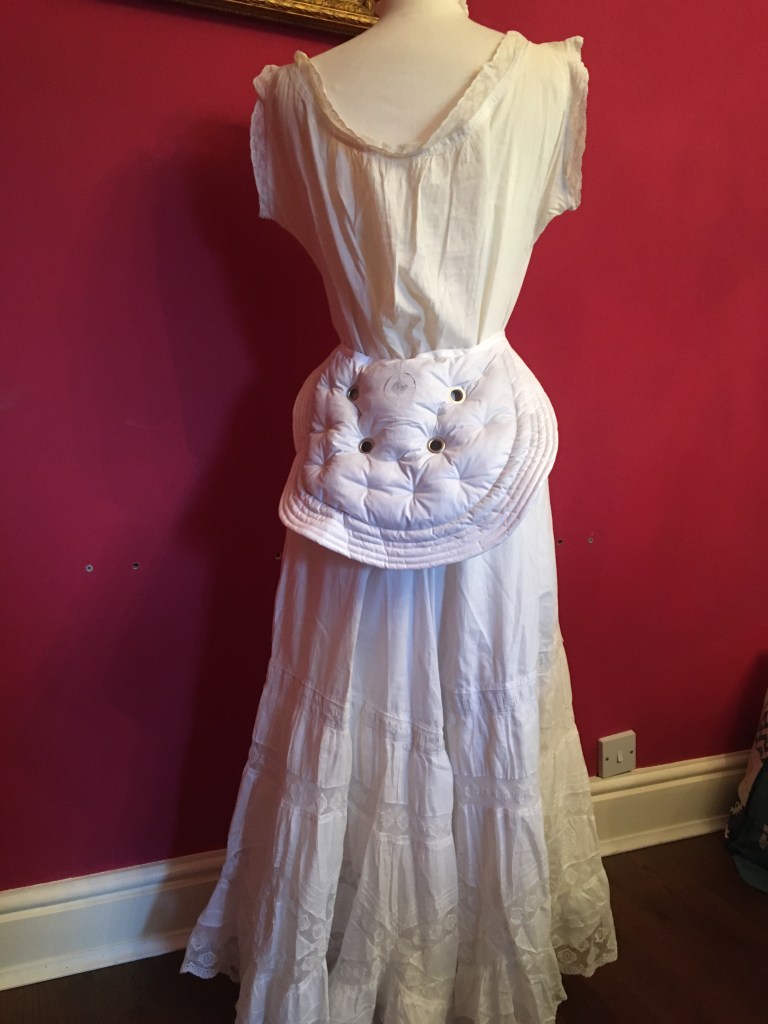
Finished pad over original c.1890s-1900s chemise and petticoat.
Notes
You can also fill your bustle pad with carbage (off-cuts of fabric). I have done mine with shredded wool fabric and yarn; however off-cuts of other types of fabrics can make the pad very dense and heavy — not great after several hours of dancing! If you want to use some of your off-cuts, I recommend mixing them with a lighter stuffing like polyfill stuffing, wool, dryer lint — anything that is light and voluminous.
Sources
- ‘The Scott’ Ventilated Hip Pad & Bustle by Charles H. Scott, c. 1905. KL-2017-087. The Underpinnings Museum.
- US Patent for Ventilated bustle and hip-form US723495A by Charles H Scott (1903).
- Hip Pad-Style Bustle, c. 1895–1905. 2004.5.9. FIDM Museum.
- ‘Undergarment ensemble, circa 1900’, FIDM Museum & Galleries (12 March 2010).
Related Links
- ‘Making an 1890s Bustle Pad’ by Enchanted Rose Costumes. YouTube (2019) — very good video showing the construction of a three-piece version of ‘The Scott’.
- ‘The Scott Hip Pad’ by Miss Temby — a blog post of the construction of a three-piece version of ‘The Scott’ based on an original example.
